
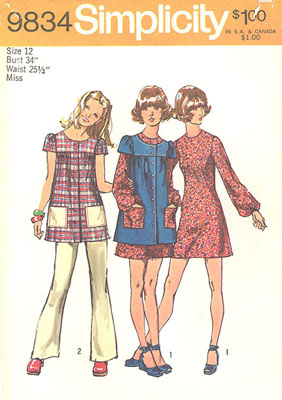
This fun 1970s pattern really only fits in the yoke area, and then the rest of it is very free-flowing. A perfect candidate for my changing waist size! I gave the dress a bit more length, and decided I'd cut the yoke and pockets on the bias to break up the plaid a bit. Of course, cutting something on the bias means it can totally change the shape and fit of the piece, but I got around this by flat-lining, and cutting that layer on grain. I also fully-lined the entire dress because I like lined things, and because I wanted to be able to wear tights without the flannel sticking to them! I also made a simple tie to belt in the fulness because I thought it would look cuter that way. . .
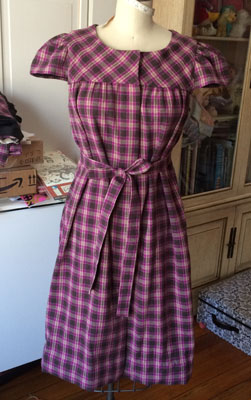
As you can see, this one is not quite finished yet! I still have to put the pockets on, but more importantly, it needs buttons and buttonholes! And that, readers, is what caused this dress, which otherwise went together really quickly, to sit unfinished to this very day and beyond.
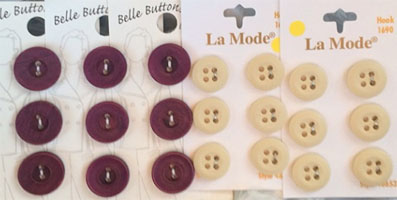
First, it was the buttons. Apparently, it is ridiculously hard to get 5/8" or 3/4" buttons in a not-all-the-way-purple-yet-not-pink-either color! When I couldn't find what I needed at JoAnn's, I turned to Etsy. After several orders, I ended up with all of these:
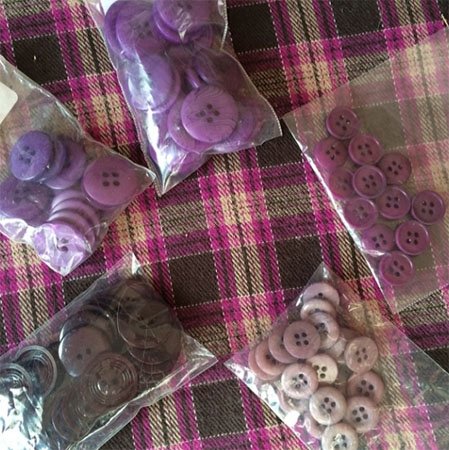
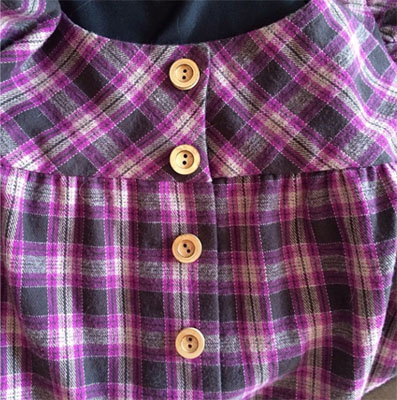
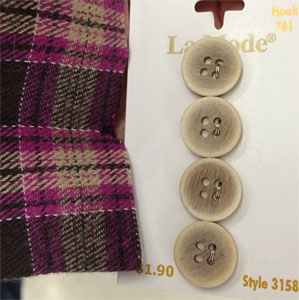
As you can see, this is kind of a weird color! The buttons at the right were the perfect shade, but only came in the one size, which was much too small. I gave up on finding the right shade of purple, and decided to try some wood buttons, thinking to maybe match the tan color:
I felt like these were just way too bright. I wanted something that blended in a bit more. So, off I went to JoAnn's, with my Granny and Glenn in tow. I was able to find two viable options there:
But this was all they had of each style, and I estimated I needed in the ballpark of 15 buttons. So my amazingly patient and supportive husband took me to not just one, not even two, but three fabric stores, all in one day, on the quest for the perfect buttons! I didn't find the others I'd found at the JoAnn's last time, (not surprising since they were discounted and I suspect perhaps no longer to be carried), but I found these:
These could totally work! But guess what? Each JoAnn's had only one or two cards left. Guess what else? There was major color variation between cards. Argh!
By this point in time, I was about ready to give up all together, when my good friend Sarah stepped in and suggested we try Grey's Fabrics. When I got to the store and pulled out the swatch, Sarah of Grey's first of all recognized it off Instagram (my tale of button whoah had spread far and wide!) and second, knew just what to do, and directed me to these fabulous 5/8" shell buttons:
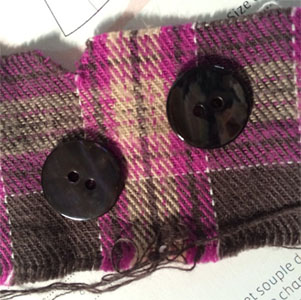
SUCCESS AT LAST!!!!! She had plenty in stock and they were clearly going to be fabulous! Also, her prices are so much more reasonable than JoAnn's. Grey's all the way!!!
Next up, I procrastinated for a while because I was really quite tired from all the button drama. Just kidding! In reality though, I'd become rather sick of even thinking about it. But at least, I sat down to finish the dress. I grabbed some test fabric to practice my machine buttonholes as it had been a really long time since I'd done a buttonhole by machine. (In historic sewing - which is primarly what I do - buttonholes are done by hand, or not at all because there's a lot of hooks/eyes and closing things with ties as well!)
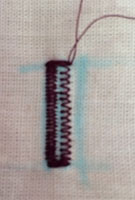
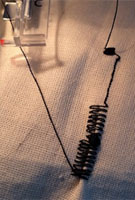
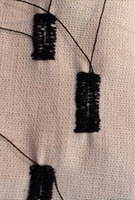
My Husqvarna Viking utterly failed me. I knew I'd had trouble getting the buttonhole feature working when I first got the machine, but at the time, I figured I must be doing something wrong, because I was being too lazy to read the booklet. This time, I knew I was doing everything correctly because I carefully read the book, as well as watched YouTube videos of similar Viking machines executing buttonholes. If I set the machine to the settings indicated in the manual, I get a buttonhole (HAHAHA NOT REALLY!) like the one shown on the left below. If I turn the dial with the buttonhole image so that it is nowhere near the buttonhole image any more (so in complete contradiction to what the guide tells you to do), I get the one shown in the middle below. At least this one looks like a buttonhole, but it was ridiculously thick and heavy. I hated it! So, I pulled out my old Singer, and gave that one a go. That's the example below on the right. This machine made a nice buttonhole. . . On one side! I know on some machines there's a little screw-type-thing you can turn to balance the buttonhole, but my Singer doesn't appear to have one. I'd probably have to open up the machine to get to it, and that's a bit more than I'm willing to mess with.
My other sewing machine options in the house are all antique and have no buttonhole settings, attachments, or anything like that, and are not really in what I'd call good working order! So we have a bit of a crisis here. Theoretically, I could do them by hand, but in addition to the 15 this dress needs, I also have an unfinished Beignet skirt (so that's another 11 or so), a summery blouse I made ages ago that is done except buttons (I think there are about 7 or 8 on that), a vintage repro shirt I have almost finished for my husband (another half dozen or so there), a pair of doll pajamas (3 more). . . And I feel like I'm forgetting something, and not even taking into consideration my future projects. So, that's a lot of buttonholes! I think I need to somehow get a machine into my life that can do buttonholes. . . Well it is my birthday in a few weeks, after all. . . ;)
No comments:
Post a Comment